The Williamsburg Door or Wall Basket is all dressed up for spring moving from the bright yellows and whites of Easter into the early spring colors of lavenders, blues, pinks and purples. As the decorating themes for the months and seasons change, I will send you different ideas to keep your basket fresh and exciting and to make sure everyone feels welcomed to your home. Today I will show you how to fill your basket with blues and lavenders. You may still keep some of your Easter blooms if the colors fit the theme, but I used just 3 bunches of flowers that were on sale at Michael's. I add a couple of dark purples to move my basket-scape into early spring. So, let's get to "planting" your basket and the best part is dirt is not required!
You will need styrofoam, 1/4" wide smooth ribbon, a bit of shred, 3 floral picks, a piece of plastic 1/4" wide by 8" long, and of course, your basket... the foam and shred you will have already, if you bought a kit or basket from my Etsy shop. I cover the foam with plastic, a grocery bag works nicely here... it keeps the styro crumbs from getting all over the place. Slip this into the basket and cover it up with shred. If the picks are very full of blossoms, you may only need to bend the bottoms and tuck them into the basket and they may hold themselves all nestled together.
I cut the stems into individuals picks... it makes them easier to "plant" into the baskets and makes this fun, quick and dirty. Dirty, but Anette, you said "no dirt required"? Well, then that makes this design just plain quick, yeah ;^)
Try to work in odd numbers to keep your eye from naturally dividing the basket in half... I added one big hydrangea bloom just to the left of the middle... place 5 lavender blossoms around it... then 1 blossom to the left and 5 to the right of the hydrangea... I have some pipberry branches in a creamy white hanging around so I added them too... I just can't stop, it is so much fun.
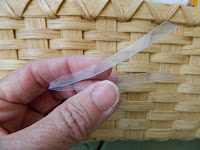
The hardest part to decide, I think, is how you want to place the ribbon... should I go around the basket for 3 rows as if it were dyed reed or just make a simple bow or add a few ribbons of color to the front... well, I went with my third choice. This IS supposed to be quick after all. Bend the piece of plastic in half, cut to a slight taper, slip under a weaver, insert the ends of the ribbon inside the plastic, then pull on the plastic "needle" to help guide the ribbon through the weaving... pull then ends through the loop and tighten... make two more ribbon loops and you are DONE!
Hope you like your Williamsburg Door Basket Makeover for April!
Happy Weaving...
WHAT, you don't have a Williamsburg Door Basket?
The completed basket, the very one you see here will be available at my Etsy shop in a day or two,
but kits are available (if you are a weaver) or just the basket so you too can join the fun and make over your basket every month.
Leave me a comment below and let me know
what you would like to see for this basket!


